Tired of wilting plants? The hydroponic wick system could be your solution! This simple setup uses a thirsty wick to deliver nutrients straight to the roots – no green thumb required.
KEY TAKEAWAY
- A hydroponic wick system allows plants to grow using only water, nutrients, and a wicking material, making it a popular choice for beginners. (2)
- The system uses two containers – one for the nutrient-rich water reservoir and another for the plant and growing medium, with a wick that draws up the solution.
- Wick systems are affordable, easy to set up and maintain, and can be used to grow a variety of plants, including herbs and leafy greens.
When I heard about growing plants without dirt using something called a “wick system”, let me tell you – I was skeptical. (1)
How could something so low-tech really work? But my curiosity got the best of me.
I threw one together for pretty cheap using some buckets, string and perlite.
Lo and behold, within days I saw sprouts popping up everywhere!
I couldn’t believe such a janky setup was actually nourishing those roots.
Best of all, this thing is insanely low maintenance.
No pumps or tubes like other hydro methods. Just add water and let the wicks do their thing.
These plants water themselves practically!
So if you wanna give soilless gardening a try but don’t want a Rube Goldberg contraption, give wick systems a whirl.
Even this doofus could do it.
Stick around and I’ll show you how to set one up that’ll have you growing your own greens with zero digging required.
Gathering the Necessary Components
Choosing the Right Containers
After years of tinkering with various hydroponic setups, I’ve found the right containers are key for a successful wick system.
Here are a few of my recommendations based on what’s worked well for me:
- For the reservoir, look for any watertight pot or container with a large surface area to prevent mineral salt buildup.
- Net pots or miniature nursery pots placed inside a larger planter pot allow for easier planting and harvesting while keeping the wick and plants organized.
- When choosing containers, make sure the wick fits snugly through holes drilled in the reservoir lid and planter pot bottom. Proper wicking is essential!
Selecting an Appropriate Wick Material
Different types of wicking materials have their pros and cons. Based on my experience, here are a few top picks:
- Nylon wick cord is hardy, absorbs liquid well, and maintains a steady flow of nutrients over time better than natural fibers like cotton rope.
- Thick wicking material like nylon ensures optimal uptake of water and prevents disruptions to your plant’s nutrient supply.
- Natural fibers degrade more quickly than synthetics, so nylon provides the best long-term wicking performance.
Picking a Suitable Growing Medium
When selecting a growing medium, these three have proven themselves after many trials:
- Coir provides ideal water-holding and aeration for plant roots, closely mimicking potting soil.
- Perlite adds airflow but risks drying out, so coir performs more reliably.
- Most important is fluffing the medium to allow complete nutrient saturation around each particle for excellent plant access.
Preparing the Nutrient Solution
These formulations have served me well for seedlings and herbs in my wick systems:
- Mix a light solution of just nitrogen, phosphorus, potassium, calcium, and magnesium, like Masterblend, at quarter-strength concentration.
- Gentler nutrient levels suit the lower demands of greens, herbs, and seedlings growing in wick systems.
- Gradually increase feed amounts over time as plants mature to full production strength. Adjust if toxicity symptoms arise.
Patience is what you need to lead problem-free gardening with this setup.
Setting Up the Hydroponic Wick System

Source: Green Our Planet
Assembling the Containers
The first step is to gather your two containers – one for the nutrient reservoir and one for the plant medium and roots.
For the plant container, use a clean bucket or trays with drainage holes near the bottom.
Drill holes along the outer edges so the wicking cord can pass through from the reservoir.
This allows the cord to absorb water without blocking drainage.
Adding the Growing Medium
The growing medium is what will support the plant’s root structure.
It should hold water and nutrients while allowing for aeration.
Coconut coir is an excellent porous option that wicks water evenly.
Add coir to the plant container, leaving several inches of room at the top for growth.
Flatten it to maximize the growing area.
Creating a Wicking Cord
Cut a long piece of cotton cord to act as a wick.
I like to use braided cotton as it absorbs water well without overlapping.
Lay the cord into the wet coir so one end touches the bottom and trails out a hole.
Adjust the length submerged to control waterflow.
Placing the Plants
When introducing young plants, create holes in the coir where the stems will go.
Gently set each plant in its hole so roots sit below the surface but crowns remain above.
Pack additional coir around to stabilize.
Check that the wick lays near the base of each stem to sustain root growth.
Filling the Reservoir
Fill the reservoir container with pH-balanced nutrient solution just below the wick outlet hole.
Continually monitor water levels and replenish so the wick stays moist.
Adjust nutrient concentrations for each plant’s needs as they drink more with maturity.
In 2-4 weeks roots will reach the reservoir, completing the system.
With regular maintenance like cleaning drainage, you’ll be well on your way to a thriving wick hydroponic garden that uses 95% less water than soil.
Slide your plants a drink and watch them flourish with this clever capillary convection.
Maintaining a Thriving Wick System

After years of trying different hydroponic systems, I’ve found that the wick method is one of the easiest for beginners to maintain. (3)
Proper monitoring and occasional adjustments are key to keeping your plants healthy.
Here are my tips for thriving with this simple hydroponic approach.
Monitoring and Adjusting the Nutrient Solution
When using a wick system, it’s important to regularly check three things: nutrient concentration, pH levels, and how much solution remains.
Use test strips weekly to ensure concentrations are where they need to be for optimal growth.
And replenish as needed – these plants work hard for us, so make sure they have everything they require!
Preventing Mineral Salt Buildup
This is crucial for long-term success.
Every 10-14 days, I replace about 30% of the nutrient solution with fresh, pH-balanced water.
This flushes any built-up salts from the growing medium.
Left alone, these deposits can accumulate to toxic levels over time.
But with a little TLC, your plants will be spared this unpleasant fate.
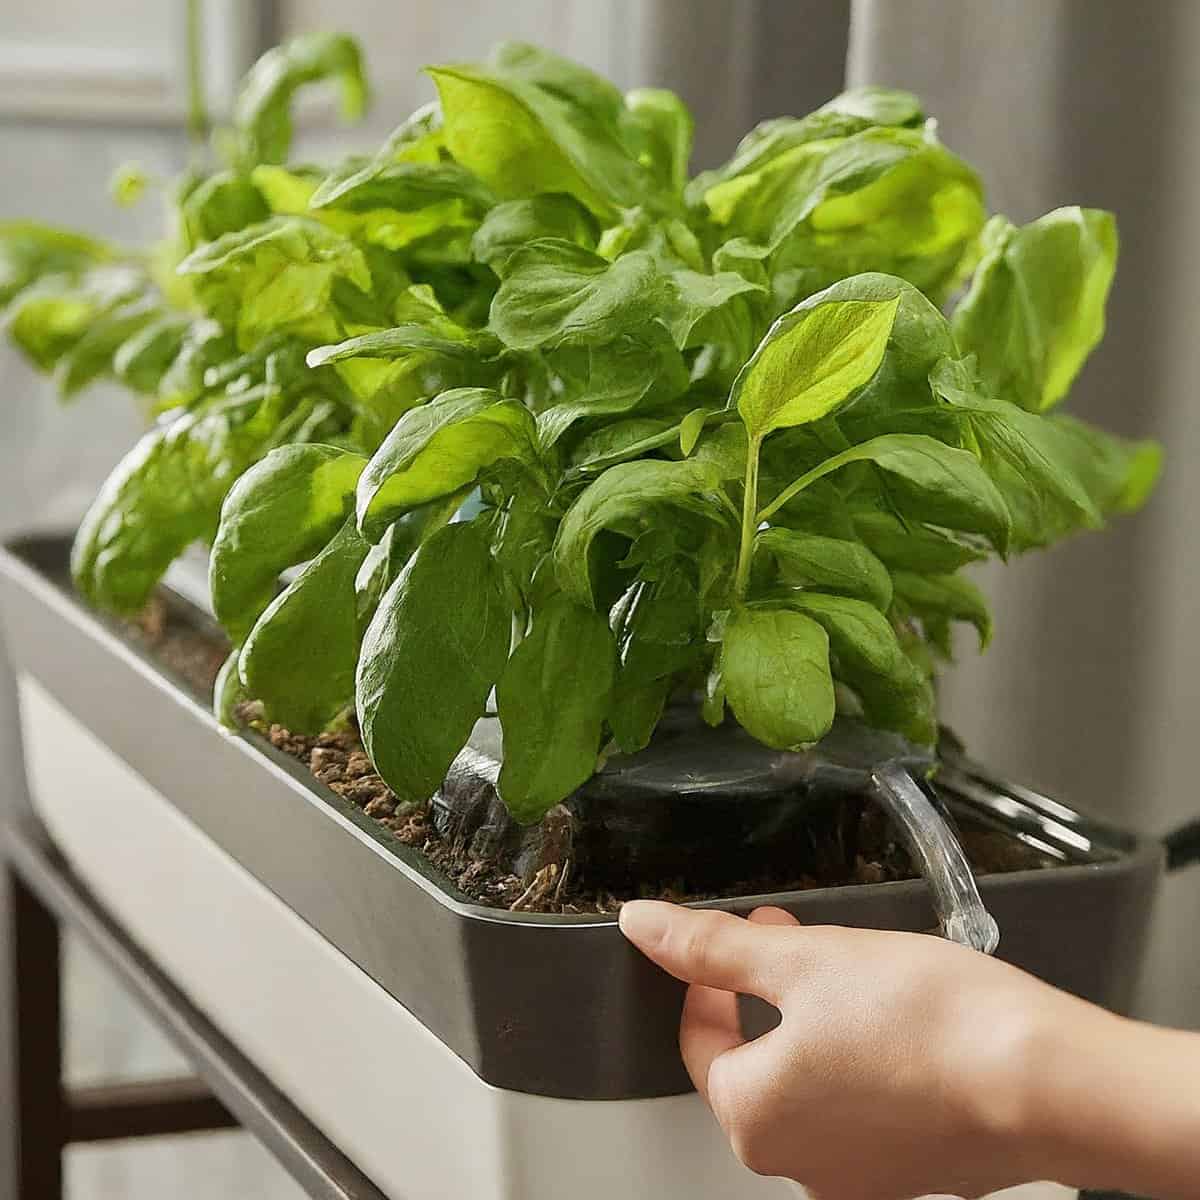
Choosing Compatible Plants
In my experience, herbs and leafy greens thrive best with the wick method.
Their shallow roots are well-suited to wicking up just what they need.
But steering clear of thirstier veggies like tomatoes and peppers is wise – their high demands risk outpacing what a wick can provide.
Stick with low-maintenance friends like mint and lettuce for low-stress results.
By keeping an eye on a few simple factors, your hydroponic wick system can produce bountiful harvests with minimal fuss.
Experimenting with different plant pairings also opens up opportunities for fun discoveries.
Most of all, have patience as your crops develop – the rewards of homegrown flavor are worth the wait.
With some trial and error, you’ll soon be an old pro at this relaxing way to grow.
Overcoming Common Challenges
After years of experimenting with different hydroponic systems, I’ve found that wick systems require some fine-tuning to avoid potential pitfalls.
With the right precautions and problem-solving techniques, you can have yourself a thriving plant oasis.
Addressing overwatering and underwatering
- Check soil moisture levels with your finger. Wilting or soaked soil means adjusting the wick material or reservoir.
- Use two to four wicks to efficiently transport water based on plant needs. Go thicker for fruiting veggies and thinner for leafy greens.
Dealing with nutrient deficiencies
- Watch for signs like yellowing leaves. Test runoff with strips to identify if it’s a lack of nitrogen, phosphorus etc.
- Adjust nutrient concentration up or down gradually until issue clears up. Taking notes helps recognize patterns.
Preventing and managing pests or diseases
- Catch issues early by inspecting plants daily. Isolate any with pests and spray with neem or insecticidal soap.
- Try ladybugs or praying mantises for natural pest control. Clean reservoir and containers between uses to kill pathogens.
Best Practices
- Go for a reservoir with a large surface area to prevent mineral buildup through evaporation.
- Pick your plants – avoid “heavy feeders” like tomatoes. Leafy greens thrive better.
- Use a fast-wicking substrate like coco coir or perlite for consistent moisture access.
- Flush periodically by running pH-balanced water through to clear salts. Weekly is a good rule of thumb.
With some experimenting, you’ll develop green thumbs in no time! Message me directly for any other wick system tips.
FAQ
How does a hydroponic wick system work compared to other hydroponic systems?
A hydroponic wick system relies on capillary action to supply water and nutrients to plant roots through a wicking material instead of using moving parts or electricity like other hydroponic systems like ebb and flow or deep water culture systems.
The wick pulls water from a reservoir to the grow medium where plant roots can access it without pumps or timers.
What types of growing media and wicking materials are commonly used in a wick system?
Two popular choices for the grow medium in wick system hydroponics are coco coir and rockwool cubes, which both allow for ample root growth.
Meanwhile, common wicking materials include cotton rope and nylon rope, as both effectively transport water and nutrients from the reservoir through capillary action to sustain plant roots.
Are wick systems best suited for only small plants or can they accommodate larger plants?
While wick systems are ideal for starting seeds and growing starter plants or house plants, with some adjustments they can absolutely accommodate larger plants.
Using a deeper reservoir and thicker wicking material can ensure an adequate water and nutrient supply for vegetables, herbs, and even small fruiting plants up to a few feet tall.
What are some tips for assembling a DIY hydroponic wick system?
A simple DIY wick system can be assembled using a storage container, grow medium like coco coir, a wicking material like cotton rope, and nutrients.
Make sure the rope’s reservoir end is long enough to reach the water and its grow medium end extends at least an inch above the top of the medium for ideal capillary flow.
Adjust rope length as plants grow for best results.
Are net pots or plain old plant pots better for wick systems?
Net pots are a popular option since they allow for easy access to the roots.
But plain old terra cotta or plastic plant pots work just as well! As long as there’s a hole for the wick cord, even a discarded yogurt container could work.
For us budget botanists, get creative – this is a low-cost hobby!
Does a wick system need an air pump like other hydroponic methods?
Nope, no bubbly air pump needed for these simpler systems.
While an air stone can add oxygen to deep water culture solutions, wick systems are best suited for passive hydro with just fresh water and nutrients in the reservoir.
No moving parts means these systems are great for beginners and busy folks – all you need is a little patience for capillary action to do its job.
What is the best water level to maintain in a wick system reservoir?
Most wicking material packages advise keeping the water level at least an inch below the grow medium so it stays moist and aerated.
Too high and the medium may become soggy.
Too low and the wick won’t be able to do its job moving water to the thirsty plant roots.
Monitor the reservoir so it doesn’t go empty but plants don’t get flooded either.
With some trial and error, you’ll find the sweet spot!
To Sum It Up
After spending years testing different systems in my garden, I’ve found hydroponic wick farms to be a fun and fancy-free way for newbies to get their feet wet in soilless growing.
With a bit of trial and error in selecting the right combo of wicks and substrate, anyone can perfect their personal plant incubator.
While not the most heavy-duty setup, wick rigs allow for casual cultivating of tasty teases like tomatoes and thyme.
So if you want a low-effort, low-stakes start in hydro that’ll have even farming fledglings feeling like farming all-stars, then look no further than this brilliantly basic approach.
References
- https://www.ncbi.nlm.nih.gov/pmc/articles/PMC10625363/
- https://ponicslife.com/hydroponic-wick-system-the-best-system-for-beginners/
- https://www.powerhousehydroponics.com/4-tips-for-maintaining-hydroponic-wick-systems/
Related Articles
- https://tophydroponicgarden.com/hydroponics-for-beginners/
- https://tophydroponicgarden.com/hydroponic-systems/
- https://tophydroponicgarden.com/items-needed-for-hydroponic-system/
Was this helpful?

I’m Barrie L., a passionate hydroponic gardening enthusiast dedicated to cultivating thriving, soil-less gardens. With a focus on all things hydroponic, I share my expertise on innovative growing techniques and sustainable practices through my blog, tophydroponicgarden.com. As a seasoned hydroponics specialist, my goal is to inspire and guide fellow gardeners in harnessing the power of water-based cultivation for bountiful and eco-friendly harvests. I’m also an author of the book “Hydroponics For Absolute Beginners: Your Step By Step Guide For How To Create An Hydroponics System At Home Without Soil, For Growing Vegetable, Fruit And Herbs.” which is sold on Amazon. Join me on a journey of redefining the way we cultivate plants, one nutrient-rich solution at a time. Happy growing!