Hydroponic setups get messy fast. Roots twist around each other, old nutrients cling to every surface, and algae shows up when you least expect it. One day the system looks spotless, the next it’s clogged and maybe even spreading something nasty.
Cleaning the grow media isn’t just about making things look good. It’s about keeping plants alive, keeping the whole thing moving. Every type of media needs its own approach. Clay pebbles want one thing, rockwool another, and coco coir is its own beast.
Why clean? Because if you skip it, you’ll notice. How to do it? That’s the trick.
Key Takeaways
- Old plant bits need to go. If you leave them, pathogens and algae might show up, and nobody wants that mess. Sterilizing the media helps, probably more than most people think.
- Reusable stuff like clay pebbles or coco coir? Rinse them well, let them dry out. They’ll probably last longer that way, though nothing lasts forever.
- Cleaning every part of the system after each crop cycle, pipes, trays, media, all of it, seems to make a real difference. Roots grow stronger, nutrients don’t get stuck. It just works better. Feels right.
Why Cleaning Hydroponic Grow Media is Essential
Preventing Disease and Pest Issues
Removing Residual Organic Matter to Avoid Pathogens
First thing you notice with hydroponic media, there’s always leftover plant stuff. Roots, dead leaves, bits of stem, just hanging around. They’re not just messy. They’re like an open invitation for every kind of pathogen.
Microbes, bacteria, fungi, whatever else is waiting, they all love decaying matter. If you leave it, you’re probably asking for root rot or some weird fungus, or bacteria that’ll wipe out your next crop.
You need to pick out all that junk before you even think about rinsing or soaking. Makes sense, right? Like, nobody scrubs a floor with garbage still lying around.
Eliminating Algae, Bacteria, and Fungi Build-up
Algae and bacteria, they always find a way in. Especially when the media stays wet, packed with nutrients. They steal oxygen, rob nutrients from your plants, clog up the media.
Sometimes they even spit out toxins that mess with roots. Using something like hydrogen peroxide or a weak bleach mix, usually three percent hydrogen peroxide or a one to ten bleach to water ratio, can knock them out.
If you skip this, you’re just asking for trouble. Problems show up fast.
Maintaining Nutrient Flow and Media Longevity
Preventing Nutrient Blockages
Fertilizer salts build up. It just happens. Over time, they start plugging up the media, blocking water and nutrients from reaching the roots. That’s nutrient lockout. Plants stop growing right.
You need to flush the media with clean water, sometimes soak it in something acidic. Citric acid at about two grams per liter usually works. Think of it like clearing out a clogged drain. You can’t ignore it.
Extending Life of Reusable Media Types
Some media, like clay pebbles, perlite, or coco coir, aren’t just for one use. You can run them through several cycles if you clean them right. Scrub out the old roots, get rid of leftover salts and microbes.
That’s what keeps them working. Saves money. Cuts down on waste. But if you skip cleaning, the media breaks down faster, stops doing its job, might even hurt your plants. It’s a risk.(1)
Step-by-Step Cleaning Process for Hydroponic Grow Media

Credits : Greenhouse Solutions
Removing Organic Debris
Manual Removal of Roots and Dead Leaves
Roots and dead leaves, they just have to be removed. No way around it. Pick them out by hand, one piece at a time. It feels endless sometimes, especially with clay pebbles or coco coir.
Shaking the media helps, or rubbing it between your palms. Bits and pieces fall loose. It’s slow work. Not much fun, honestly. But if you leave any behind, you’re basically asking for headaches down the line. Mold, rot, weird smells. Nobody wants that.
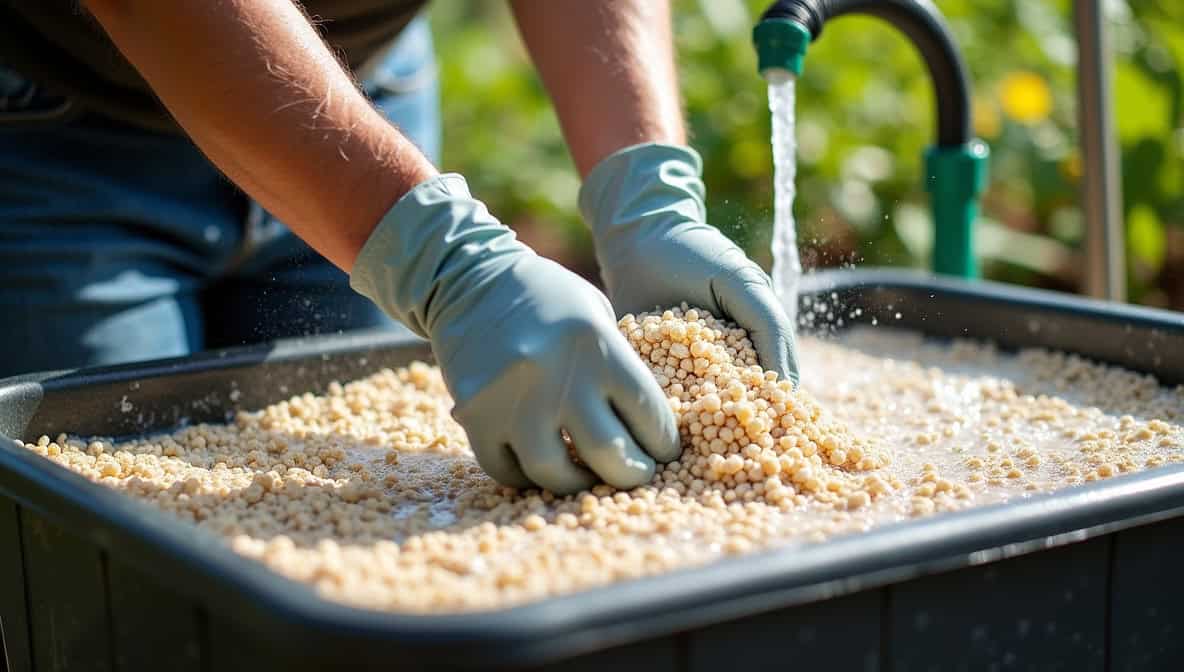
Initial Rinsing to Dislodge Loose Material
After you’ve picked out the big stuff, rinse the media under running water. Use a colander or a mesh basket, something that lets water flow through while you hold everything steady. Dust and tiny scraps, even leftover salts, they all get washed away.
Sometimes you have to rinse a few times before the water runs clear. It’s worth it. This part really sets things up for the next steps. If you skip it, sterilizing just doesn’t work as well.
Disinfecting the Media
Preparing and Using Hydrogen Peroxide Solutions
Most people grab hydrogen peroxide, the 3 percent kind you find at the drugstore. Soak your media so everything’s covered. Let it sit for at least an hour. That’s usually enough time. Hydrogen peroxide kills bacteria, fungi, algae, all the usual suspects.
If you rinse everything well afterward, there’s nothing left behind to hurt your plants. It breaks down into water and oxygen. Simple, really. Sometimes you can almost smell the clean.
Using Diluted Bleach for Deep Sterilization
Bleach is a different story. It’s stronger, but you have to be careful. Add about a quarter capful to every one or two gallons of water. Soak the media for ten to twenty minutes. Not much longer. That’s usually enough. After that, rinse the media over and over.
Three or four times, maybe more, until you’re sure there’s no bleach left. Any leftover bleach can burn your plants. It’s not worth the risk. So rinse again, even if you think you’re done. Better safe than sorry.
Addressing Stubborn Residues
Gentle Scrubbing Techniques for Media with Crevices
Some media, like clay pebbles or gravel, have crevices where organic matter hides. After soaking, use a soft brush or nylon bristle brush to gently scrub these areas. Avoid harsh scrubbing that might damage the media. For small parts like net pots or tubing, toothbrushes or bottle brushes work well.
Comprehensive Rinsing Procedures
Multiple Rinses to Remove Chemical Residues
Rinsing after disinfecting is more than a quick splash. It involves multiple thorough rinses to ensure no chemical residue remains. This is especially true for bleach-treated media. Residual chemicals can stunt plant growth or cause toxicity.
Importance of Thorough Flushing to Protect Plants
Media can trap more than bleach. It holds on to salts. Nutrients build up there. They don’t leave unless pushed. If ignored, the next crop might suffer. Roots will stall. Plants go hungry even if you’re feeding them.
Flushing resets things. Think of it like turning the page. Fresh water, no nutrients. That’s what clears the way.
A good flush involves:
- Pouring clean water slowly and evenly
- Letting it run all the way through
- Repeating two or three times
Some growers use rainwater for this. Others use distilled. Doesn’t matter much. What matters is volume and movement. Don’t stop at the top, flush till water drains clear.
Salts don’t always show themselves. But the harm they do builds quietly. Better to wash them out while there’s time.
Drying and Storage
Air Drying Methods to Prevent Mold Growth
Once cleaned and rinsed, spread the media on a clean surface to air dry completely. Damp media can foster mold or bacterial growth during storage. Using fans or placing media in a well-ventilated area speeds drying. Avoid storing media while wet.
Ensuring Complete Dryness Before Reuse
This is where some folks get impatient. They cleaned, they rinsed, they laid it out. But then life got busy. The media was dry-ish, so they used it. A week later, mushy roots, strange smells, gnat larvae.
Moisture left inside media invites all that. Pathogens love a damp hiding spot.
Before reuse, check:
- If it feels cold, it’s still damp inside
- Shake it. If it clumps, it’s not done
- Press a handful, if it sticks, wait longer
The best way is to wait a full 48 hours in warm air. Let it sit. Let it breathe. Set reminders if you have to.
Because putting wet media back in the system is like never having cleaned it in the first place. Patience is cheaper than a second round of root rot.
Media-Specific Cleaning Considerations

Clay Pebbles and Gravel
Rinse, Soak, Scrub, and Dry Protocols
Clay pebbles hold up like river stones. They don’t break easy, not even after soaking for days. Drop them in a five-gallon bucket, pour in hydrogen peroxide or bleach (1 cup per gallon water), and let them sit.
Debris clings in the crevices, so scrubbing matters. Real elbow grease. After that, rinse again and again. Then leave them to dry under sun or fan, bone-dry, not damp. If treated right, this media can run for many cycles without falling apart or fouling roots.
Perlite
Gentle Handling to Avoid Dust Loss
Perlite’s tricky. It looks like snow and crushes like chalk. Handle it rough, and it turns to dust. Folks who grow in it know, go slow.
Perlite breaks easily. It’s volcanic glass puffed with heat, like popcorn. That makes it light and full of air pockets, great for root aeration. But fragile. Too much handling or pressure, and you lose structure. You lose drainage.
Cleaning perlite takes a soft touch:
- Use wide strainers or cloth bags
- Rinse with low pressure water
- No squeezing or packing
Scrubbing is out of the question. Soaking works better. A mix of hydrogen peroxide (1:1 with water) or bleach (one tablespoon per quart) disinfects without pressure. Soak for 4 to 6 hours, rinse gently, then drain.
Old perlite crumbles. You’ll notice it looks smaller, maybe a little muddy. If it stops holding air, toss it. Most growers only reuse perlite once or twice before replacing it. A fresh bag costs little, and roots thank you for the upgrade.
Rinse and Soak Guidelines
Perlite should be soaked long enough to sanitize, but not so long it turns to mush. Use hydrogen peroxide at 3 percent strength. Leave it 30 minutes, maybe 45. Rinse at least three times, some say five, until water runs clean.
No need to stir hard. Let it float and sink naturally. Shake it too much, and you’ll ruin it. Keep it in mesh baskets if you can. That helps keep the chunks together.
Coco Coir
Root Removal and Rinsing
Coco coir smells earthy when it’s fresh. But after a grow cycle, roots tangle in deep. Pulling them isn’t easy. You’ve got to tease them out with gloved hands or garden forks. Some soak the coir first, make it soft, easier to work with.
Rinse with hose pressure strong enough to flush salts, not strong enough to blow the coir apart. It takes time. Coir hangs onto things. Salt. Rot. You name it. Still, it’s reusable if treated right. Up to a point.
Limitations on Reuse Due to Degradation
Coco coir feels reliable, until it doesn’t. First grow, it holds shape, drains well. Second time, it clumps. Third? It sags, heavy and dark. That’s degradation.
Every rinse and reuse strips structure. The long fibers shear down, turning to peat-like mush. Drainage slows. Oxygen drops. Roots suffocate. What was once airy and rich becomes thick, almost like mud.
Most growers get two or three uses, tops. After that, it’s too risky. The signs come clear:
- Runoff stays dark
- Roots struggle to spread
- More fungus, more pests
People try to stretch it longer with heavy flushing or drying between grows. Doesn’t always help. Once the texture breaks down, it’s near impossible to bring it back.
If it starts feeling like wet paper instead of loose mulch, toss it. Better to replace early than fight root problems later. New coir isn’t too pricey. And healthy roots, they’re worth it.
Rockwool
Reuse Challenges and Sterilization Tips
Rockwool, it’s sharp, it’s fibrous, and it holds water like nothing else. But reuse it? That’s tricky. Most don’t.
The stuff traps salts in its dense layers. So even a long soak might not clean it. Worse, it holds pathogens. Root rot, pythium, algae. They all love hiding in old cubes.
If someone still wants to try, the process has to be exact. Soak it in hydrogen peroxide. Not the regular 3 percent, but stronger, food-grade at 10 percent, diluted 1:3 with water. Soak for 12 hours. Rinse at least three times.
But even then, it might not work. The cube’s center stays damp for too long. You get:
- Slimy textures
- Yellow runoff
- Poor seedling growth
Some growers bake it or use UV light, though results vary. Most decide it’s not worth the gamble. Fresh rockwool costs more than coir, but less than lost time. If your seedlings matter, clean might not be enough. Go new.
Cleaning and Maintenance of Hydroponic System Components
Reservoirs and Trays
Draining, Scrubbing, and Disinfecting Procedures
Reservoirs and trays collect nutrient solution and debris. Drain completely, scrub with mild soap or disinfectant, rinse well, and dry. Neglecting these parts invites algae and bacteria buildup that can spread to media.(2)
Pumps and Filters
Soaking and Cleaning Removable Parts
Pumps and filters trap particles and biofilm. Remove parts when possible and soak in hydrogen peroxide or diluted bleach. Rinse and dry before reinstalling. Clean pumps regularly to maintain water flow and system efficiency.
Grow Room Surfaces
Routine Disinfection to Prevent Recontamination
Nothing clings like mold spores in dry air. Or fungus gnats waiting in corners, under the table legs. A grow room breathes the same as a living thing, and if it gets sick, everything inside catches it.
Cleaning the surfaces isn’t about shine. It’s about stopping the invisible things. The walls, the shelves, even the undersides of trays, these are landing pads for dust, pests, spores. And spores don’t stay put.
Disinfectant wipes work on smooth plastic, metal racks, fan housings. Mop floors weekly with diluted bleach or peroxide mix. If there’s visible grime, it’s already overdue. Keep these habits regular:
- Wipe walls and shelving at least twice a month.
- Sweep before every watering day.
- Clean intake filters and vents.
- Dust light bulbs gently with dry cloths, don’t spray near wires.
Air carries more than CO₂. It brings spores from old plant wounds, maybe the odd mite hitchhiking from an open window. And once these things land, they wait.
So don’t wait. A rag and spray bottle do more for yield than any fancy nutrient booster. Even if it feels like overkill sometimes, better too clean than too late.
The best growers? They treat the room like it’s part of the system, not just the backdrop.
Safety Measures During Cleaning
Protective Gear Recommendations
Wear disposable gloves and eye protection when handling disinfectants. Some chemicals can irritate skin or eyes. Avoid inhaling fumes by working in well ventilated areas.
Chemical Handling Precautions
Some things shouldn’t mix. Bleach and peroxide is one. That blend makes chlorine gas. It stings the throat, burns the eyes, and in tight rooms, it can knock you out. Don’t mess with that.
Always label bottles clearly. Keep bleach far from your nutrient shelf. Hydrogen peroxide bottles should be sealed and stored in dark spaces. It degrades in light. If the solution turns cloudy, throw it out.
Use fresh mix every time:
- 1 part bleach to 10 parts water
- 3% hydrogen peroxide straight from the bottle for soaking
Never use both on the same part unless hours apart with a full rinse between. Some growers keep a little checklist taped near their cleaning station, just steps and warnings in black Sharpie. It saves time and mistakes.
Also, don’t store these under grow lights or near heating pads. Heat speeds up breakdown, can cause leaks. Safety’s not fancy. It’s careful habits, repeated every time.
Cleaning Frequency and Scheduling
Post-Crop Cycle Cleaning Importance
Clean media and system components thoroughly after every crop cycle. This prevents carryover of pathogens and buildup that can compromise the next crop.
Monitoring for Early Signs of Disease or Algae
Algae starts as a shimmer. Just a thin green line on the water’s edge or on a tray bottom. Harmless looking at first. But it multiplies fast and brings company, fungus, gnats, even root rot.
Disease usually whispers before it shouts. Leaves curl slightly. Roots lose their bright color, turn beige, then brown. The smell shifts, too. Less fresh, more swamp.
That’s the window. Before it gets bad. Spot-clean that tray. Flush the system with diluted peroxide. Cut out affected roots if needed. If the air feels damp and the walls are sweating, crank up the fan or add a dehumidifier.
Watch for:
- Discolored roots
- Slippery surfaces
- Musty odor near trays
- Sticky residue on tubing
Some growers keep a daily log, notes on smell, root color, pump sounds. Doesn’t take long, but helps spot trends. The sooner you catch something, the less you lose. And once you lose a crop to algae or mold, you never forget what early signs feel like.
Trust your nose. And your eyes.
FAQ
Why is cleaning hydroponic grow media essential after each harvest?
Cleaning hydroponic grow media prevents the accumulation of pathogenic microorganisms and maintains optimal substrate conditions for subsequent cultivation cycles.
Without proper sterilizing hydroponic medium protocols, residual nutrient deposits and decomposing organic material create anaerobic conditions that facilitate bacteria buildup and pathogen proliferation.
Regular cleaning after each grow cycle ensures maintaining hydroponic effectiveness while preventing disease transmission that could compromise future harvests and healthy root growth.
What’s the most effective method for sterilizing hydroponic medium?
The most efficacious approach involves sterilizing perlite and other substrates using a precisely calibrated 10% bleach solution, followed by comprehensive rinsing after bleach soak procedures.
This methodology effectively eliminates pathogens in hydroponics while simultaneously removing salt buildup hydroponics systems accumulate through repeated nutrient cycling.
The process requires soaking hydroponic substrate for thirty minutes, then executing multiple flush cycles with fresh water to ensure complete chemical residue removal.
How do you properly clean rockwool and clay pebbles?
Cleaning rockwool requires careful handling due to its structural vulnerability when saturated. The process involves gentle rinsing with temperature-controlled water to remove plant debris from media, followed by immersion in appropriately diluted cleaning solutions.
For cleaning clay pebbles and cleaning hydroton, mechanical agitation using specialized nylon bristle brush techniques effectively dislodges accumulated mineral deposits.
Both substrates benefit from hydrogen peroxide hydroponics treatments for comprehensive pathogen elimination.
What’s the best approach for cleaning coco coir between growing cycles?
Cleaning coco coir necessitates systematic flushing hydroponic media with pH-balanced water to eliminate accumulated electrolyte concentrations. Due to coco coir’s high cation exchange capacity, multiple irrigation cycles are required until effluent conductivity readings indicate complete salt removal.
This prevents nutrient lockout while preserving the substrate’s beneficial moisture retention and aeration properties essential for reusing hydroponic substrate effectively.
Can you use household cleaners for disinfecting grow media?
Using mild soap for cleaning provides adequate sanitation for most hydroponic substrates while avoiding harsh chemical residues. Cleaning with vinegar solution offers natural antimicrobial properties through acetic acid’s bactericidal effects, while cleaning with baking soda provides alkaline buffering to neutralize acidic deposits and remove mineral deposits.
However, thorough post-cleaning irrigation remains essential to prevent cleaning agent accumulation that could adversely affect plant physiological processes.
How do you remove algae from grow media effectively?
Removing algae from grow media requires integrated physical and chemical intervention strategies. Initial mechanical removal using specialized implements like bottle brush for small parts or toothbrush for detail cleaning addresses visible algal biomass.
Subsequently, disinfecting grow media through using hydrogen peroxide hydroponics protocols or implementing solarization of grow media techniques effectively eliminates remaining algal spores and vegetative cells through oxidative or thermal sterilization mechanisms.
What’s the proper technique for cleaning net pots and hydroponic trays?
The comprehensive cleaning protocol begins with removing dead roots and accumulated organic material, followed by mechanical scrubbing using appropriate implements. Cleaning net pots requires particular attention to intricate geometries where organic material accumulates in inaccessible areas.
For cleaning hydroponic trays, systematic application of mild detergent solutions combined with thorough mechanical agitation ensures complete contaminant removal. Complex components benefit from extended soaking small pieces in cleaning solution.
How often should you perform routine hydroponic cleaning?
Routine hydroponic cleaning should be implemented systematically following each harvest cycle and during transitional periods between crops.
This comprehensive maintenance includes cleaning grow media between crops, executing complete draining hydroponic system procedures, and thoroughly scrubbing hydroponic containers to prevent toxic buildup.
Consistent maintenance protocols ensure optimal yields while promoting cleaning for system longevity through preventive rather than corrective interventions.
What’s the safest way to sterilize media using heat?
Oven pasteurization hydroponic media represents an effective thermal sterilization method for heat-resistant substrates. The protocol involves distributing moistened media across sanitized baking surfaces and maintaining precise temperature control at 200°F for thirty-minute intervals.
This thermal treatment effectively eliminates pathogens without introducing chemical residues. Proper post-treatment cooling and adequate ventilation during processing ensure operator safety and substrate integrity.
How do you properly dry hydroponic media after cleaning?
Effective drying hydroponic media protocols prevent fungal contamination while preparing substrates for extended storage periods. The process involves distributing cleaned media across sanitized surfaces, implementing strategic using fans for drying to optimize air circulation patterns.
Preventing mold in media requires maintaining appropriate moisture levels below fungal growth thresholds. Properly desiccated substrates maintain viability for extended periods without degradation or contamination risks.
What equipment do you need for thorough media cleaning?
Essential cleaning infrastructure includes designated buckets for cleaning, protective disposable gloves for operator safety, and specialized cleaning implements. Effective cleaning requires using loofah sponges for gentle mechanical action and bottle brush for small parts requiring precision cleaning.
Maintaining dedicated cleaning equipment prevents cross-contamination while optimizing cleaning efficiency through purpose-designed tool selection for various substrate types and container geometries.
How do you clean hydroponic system components beyond the media?
Comprehensive system maintenance encompasses cleaning air pumps, cleaning nozzles, and cleaning tubing through systematic component-specific protocols. Regular maintenance includes removing mineral deposits through appropriate chemical treatments and replacing degraded media when restoration becomes economically unfeasible.
Essential procedures include cleaning the reservoir through complete draining and mechanical scrubbing to eliminate accumulated nutrient residue and biofilm formation.
When should you replace media instead of cleaning it?
Media replacement becomes necessary when cleaning protocols cannot restore functional effectiveness or when inspecting media for damage reveals significant structural degradation.
Certain substrates like rockwool may experience irreversible breakdown following multiple cleaning cycles, while others like clay pebbles maintain indefinite reusability with appropriate maintenance.
Replacing degraded media prevents compromised plant performance and potential contamination vectors that could affect subsequent cultivation cycles.
How do you maintain your grow room during media cleaning?
Comprehensive cleaning grow room procedures extend beyond substrate maintenance to include environmental sanitation protocols. This encompasses systematic mopping hydroponic area surfaces, dusting grow lights to maintain photosynthetic efficiency, and ensuring adequate ventilation systems operation.
Maintaining sanitized work environments prevents recontamination of freshly processed media while supporting overall system hygiene and effective cleaning for pest prevention strategies.
What’s the best way to dispose of old growing media?
Sustainable disposal practices include composting old plant matter and organic substrates when they no longer meet hydroponic application standards. Inorganic materials like perlite can be repurposed as soil amendments in conventional gardening applications.
Proper disposal requires removing synthetic materials and chemical treatments before implementing environmentally responsible waste management protocols that comply with local regulatory requirements and environmental protection standards.
Conclusion
Washing hydroponic grow media isn’t flashy, but it’s what keeps everything running smooth. You notice right away, skipping steps leads to problems. Scraping off old roots, disinfecting with care (some folks use diluted hydrogen peroxide), rinsing till the water runs clear, letting it dry out, these steps matter.
Each type of media needs its own touch, otherwise it breaks down or clogs up. Paired with cleaning pumps and trays, this routine probably keeps plants healthier, longer.
Related Articles
- https://tophydroponicgarden.com/grow-media/
- https://tophydroponicgarden.com/grow-media-to-avoid-in-hydroponics/
- https://tophydroponicgarden.com/water-efficient-hydroponic-grow-media/
References
- https://gpnmag.com/article/benefits-recycled-perlite/
- https://www.mdpi.com/2311-7524/9/1/51
Was this helpful?

I’m Barrie L., a passionate hydroponic gardening enthusiast dedicated to cultivating thriving, soil-less gardens. With a focus on all things hydroponic, I share my expertise on innovative growing techniques and sustainable practices through my blog, tophydroponicgarden.com. As a seasoned hydroponics specialist, my goal is to inspire and guide fellow gardeners in harnessing the power of water-based cultivation for bountiful and eco-friendly harvests. I’m also an author of the book “Hydroponics For Absolute Beginners: Your Step By Step Guide For How To Create An Hydroponics System At Home Without Soil, For Growing Vegetable, Fruit And Herbs.” which is sold on Amazon. Join me on a journey of redefining the way we cultivate plants, one nutrient-rich solution at a time. Happy growing!